
Kids teepees.
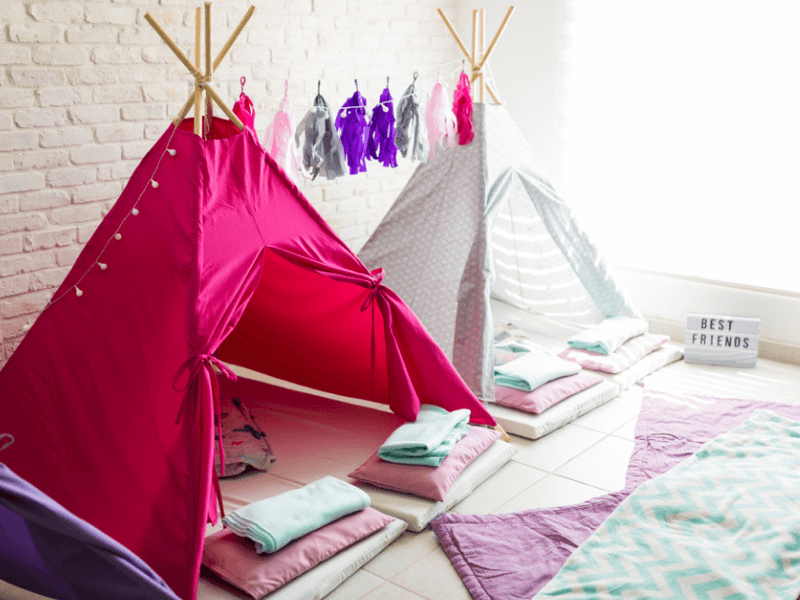
If you’ve spent more than 5 minutes on Pinterest or Instagram in the last 12 months, you’ll know – they’re all the rage right now. Little wigwam-style tents, which can be popped up indoors and outdoors, creating a cosy nook for children to read, play and let their imagination run wild.
Every child wants one. But shop-bought teepees can be expensive. Even basic canvas designs can cost upwards of £100. So why not save some money and have a go at making one yourself?
Here we’ve created a step-by-step guide on how to make a teepee tent for kids. It takes less than an hour to complete, requires zero sewing, and is the perfect size for toddlers and young children.
Stock up on a few cheap supplies, get crafty, and send us some photos of your DIY teepee!
What will I need?
To build the frame of your teepee tent, you’ll need three key materials:
- Wooden dowels
The exact size required will depend on how big you’d like the children’s teepee to be. We recommend using 4-5 wooden dowels, approximately 2m long and 30-40mm in diameter.
- Natural rope
A length of natural rope – such as flax hemp, cotton, or sisal – will work better than synthetic rope, as this will grip the wooden dowels and prevent them from slipping. This should be around 10-20mm in diameter – and it can be bought in our online store, here at RopesDirect, for a very affordable price.
- A cotton canvas drop cloth
Drop cloths can be purchased either online or at your local DIY store. Just make sure you choose one that’s big enough to drape over the teepee structure – whilst leaving a little excess for the front.
You’ll also require a drill, a pair of scissors, and a few screws and washers.
4 steps to make a teepee tent for kids
Step 1: Drill the holes
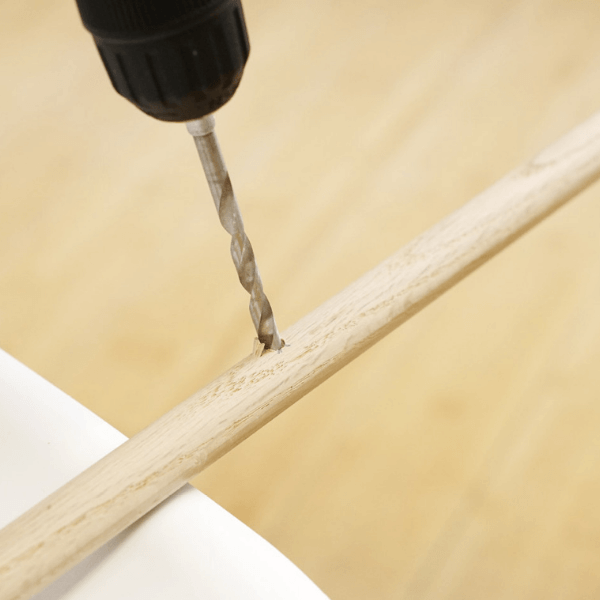
First things first, to start building your DIY teepee tent, you’ll need to drill a hole in each wooden dowel.
Our advice is to use a drill bit that is slightly larger than the diameter of your rope. Drill the hole approximately 20-25cm from the top. Once all of the holes have been drilled, smooth the area down with sandpaper – we don’t want any nasty splinters!
Step 2: Tie the dowels together with rope
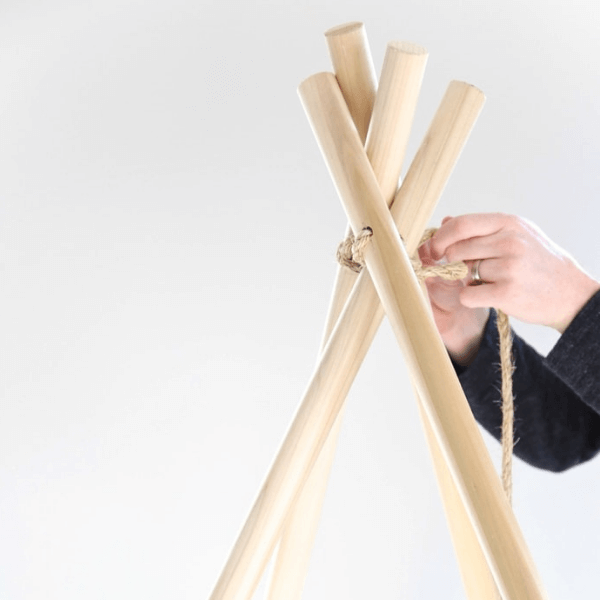
You’re now ready to create the frame.
Lie the wooden dowels on a flat surface and thread the length of rope through each hole. Tie a tight knot in the end, before standing the dowels upright and arranging them into the desired ‘teepee shape’.
To ensure your kids teepee tent is as stable as possible, we recommend using at least four dowels – leaving a much wider gap between the two at the front than the two at the back.
Once you’re satisfied with the position of the dowels, loop the rope tightly around each one, before wrapping it several times – in a full circle – around all of them. This should hold the dowels securely in place.
Tie another knot in the end and cut off any excess rope.
Step 3: Add the drop cloth
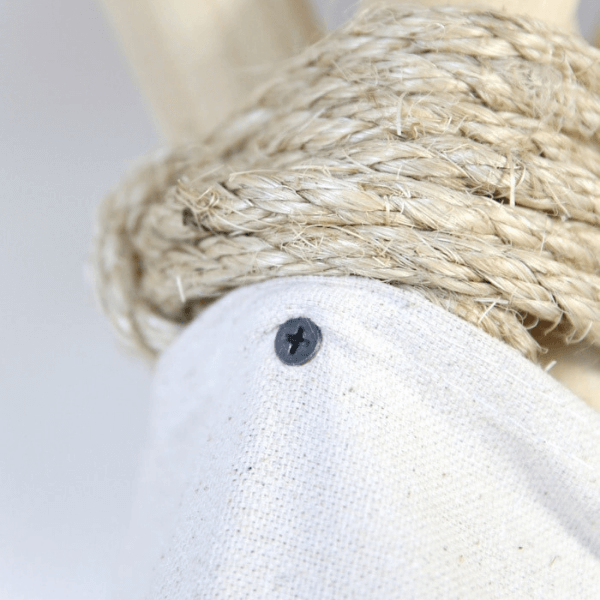
The last step involves adding the canvas drop cloth to the structure. This can be a little fiddly, but it’s important to keep it as tight and uniform as possible, particularly where the dowels meet.
Unfold the cloth, find the exact middle point, and secure this to a dowel at the back of the teepee. Simply drill a hole in the dowel, add a washer and insert a screw through the fabric into the wood.
Drape the cotton fabric around the sides of the structure, allowing it to fall naturally. Once you’re happy with the way it looks, secure it to a dowel on each side (using the same method described above).
Step 4: Accessorise the teepee tent
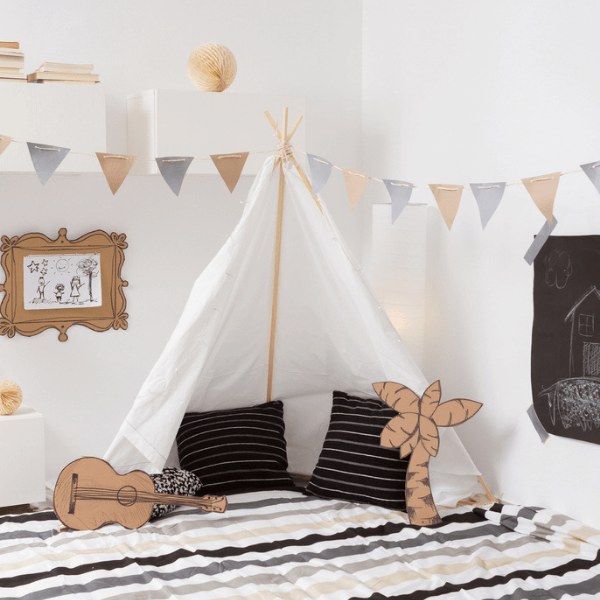
This is the fun bit. It’s time to add the final touches!
Be as creative as you like and think about what would really put a smile on your little one’s face.
Perhaps add a few fluffy cushions and blankets? Pop in their favourite toys? Or add fairy lights or bunting around the top? The possibilities are endless, and Pinterest is a great place to find ideas.
Create a magical teepee tent today
Eager to get started?
Buy the basic materials, set aside 60 minutes and create your first DIY teepee tent today. And remember, we always love to see your handiwork – especially if you’ve used natural rope from our store. So whether you’re making a single teepee tent for your little one’s bedroom or are hosting a teepee sleepover party for their birthday, be sure to send us some pics of your creations.
We’ll post the best on our website and social media pages!